Displaying Secondary Product Image on Hover
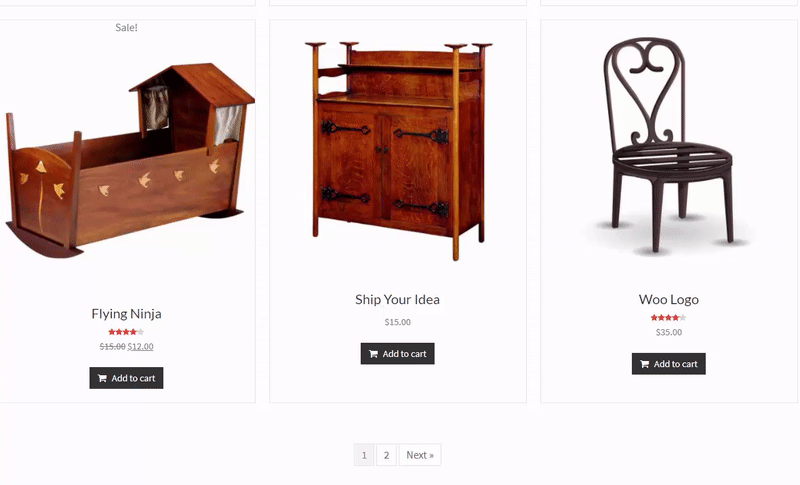
You created the WooCommerce shop & product archive page with Beaver Themer add-on and Post – Grid module. By default it is displaying the featured image of that product. I shall display the 2nd image on hover at product image position. In this article I am sharing the complete procedure for it.
Assuming that you already created the shop or product archive page with Beaver Themer and Post module (I have not PP or UABB add-on).
Post Layout: Default
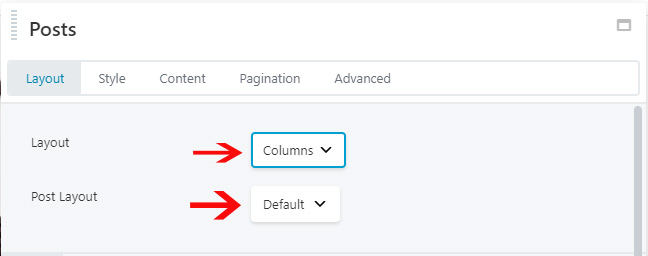
Layout: Columns & Post Layout: Default
There have a filter “fl_builder_post_grid_after_image” for columns or masonry layout. With this filter you can extra content below the featured image. Open the functions.php file of your active theme and drop this PHP snippet
Get secondary image
add_action( 'fl_builder_post_grid_after_image', 'probb_wc_product_image_back', 10 );
function probb_wc_product_image_back( $settings ) {

	if( $settings->post_type !== 'product')
		return;

	global $product;

	/**
	 * Getting the first image from Product gallery images
	 * You will upload atleast one image into Producy Gallery meta box
	 * (Dashboard ->Products -> Add/Edit product screen page. You will Product Gallery box below the Product Image box)
	 */
	$attachment_ids = $product->get_gallery_attachment_ids();
	if ( $attachment_ids ) {
		foreach ( $attachment_ids as $attachment_id ) {

			$image_title 	= esc_attr( get_the_title( $attachment_id ) );
			$image_caption 	= esc_attr( get_post_field( 'post_excerpt', $attachment_id ) );

			$image = wp_get_attachment_image(
				$attachment_id,
				apply_filters( 'single_product_small_thumbnail_size', 'shop_catalog' ), 0, $attr = array(
						'title'	=> $image_title,
						'alt'	=> $image_title,
						'class' => 'product-gallery-image'
					)
			);

			if ( ! $image )
				continue;

			echo '' . "n";
			echo $image;
			echo '' . "n";

			return;
		}
	}

	return;
}
Next open the style.css file and add this simple CSS there.
CSS
.product-image-back {
    opacity: 0;
    filter: alpha(opacity=0);
    position: absolute;
    top: 0;
    left: 0;
}

.fl-post-grid-image:hover .product-image-back {
    opacity: 1;

    -moz-transition: opacity .1s ease-in-out;
    -webkit-transition: opacity .1s ease-in-out;
    transition: opacity .1s ease-in-out;
}
Post Layout: Custom
If you did not add the code from above, you will copy them and add into your active theme files. Now we shall create the new themer property Product Back Image. So we shall use this connection field into custom post layout HTML editor. Open the functions.php file and simply drop this code at end of the file
Creating Product Back Image Property
/**
 * Product Back Image
 */
FLPageData::add_post_property( 'woocommerce_product_back_image', array(
	'label'   => __( 'Product Back Image', 'fl-theme-builder' ),
	'group'   => 'woocommerce',
	'type'    => 'html',
	'getter'  => 'probb_wc_product_back_image',
) );

/**
 * It will fetch the gallery image from product
 */
function probb_wc_product_back_image()
{
	ob_start();
	probb_wc_product_image_back();
	$html = ob_get_clean();
	return $html;
}
Now you will edit the Theme Layout or your shop page with Page Builder like video